Dolphin for Android: Change User Agent?
Certainly! Changing the user agent in Dolphin for Android can indeed be a helpful feature when you want to view a website in a different manner or if the website you're attempting to access isn't fully compatible with your device. Here's a step-by-step guide on how to change the user agent in Dolphin:
- Launch Dolphin on your Android device and navigate to the Menu. Typically, the Menu button is represented by three dots arranged vertically, located either at the top or bottom of the screen, depending on your device's configuration.
- Once you've accessed the Menu, scroll down until you find the "Settings" option and tap on it. This will open the Dolphin settings menu, where you can customize various aspects of the browser.
- Within the settings menu, search for the "Change User Agent" option. Its location may vary slightly depending on the version of Dolphin you are using, but it's usually located under the "Advanced" or "Privacy & Security" section. Tap on "Change User Agent" to proceed.
- Upon selecting the "Change User Agent" option, Dolphin will present you with a list of available user agents that are compatible with your device. A user agent is a string of information that identifies your browser and operating system to the website you're visiting.
- From the list of user agents, choose the one that suits your needs. Dolphin provides a variety of options, including user agents for different browsers and devices. Selecting a different user agent can make the website you're visiting believe that you're accessing it from a different browser or device.
By following these steps, you'll be able to change the user agent in Dolphin for Android, allowing you to experience websites in alternative ways or overcome compatibility issues with certain websites.
How do I find my user agent on Android?
To find your user agent on Android, follow these steps:
- Open your browser on your Android device.
- Tap on the menu button (usually represented by three dots or lines) in the upper-right corner of the screen.
- From the drop-down menu, select "Settings" or "Options" (depending on your browser).
- Scroll down the settings menu and look for an option called "Advanced" or "Advanced Settings." Tap on it.
- In the advanced settings, you should find an option labeled "User Agent" or "Browser Identification."
- Tap on the "User Agent" option, and you'll see the user agent information for your browser displayed on the screen.
By accessing the User Agent settings in your browser, you can easily view the user agent string, which provides information about your browser and device when you visit websites. This information can be useful for troubleshooting website compatibility issues or accessing specific website features.
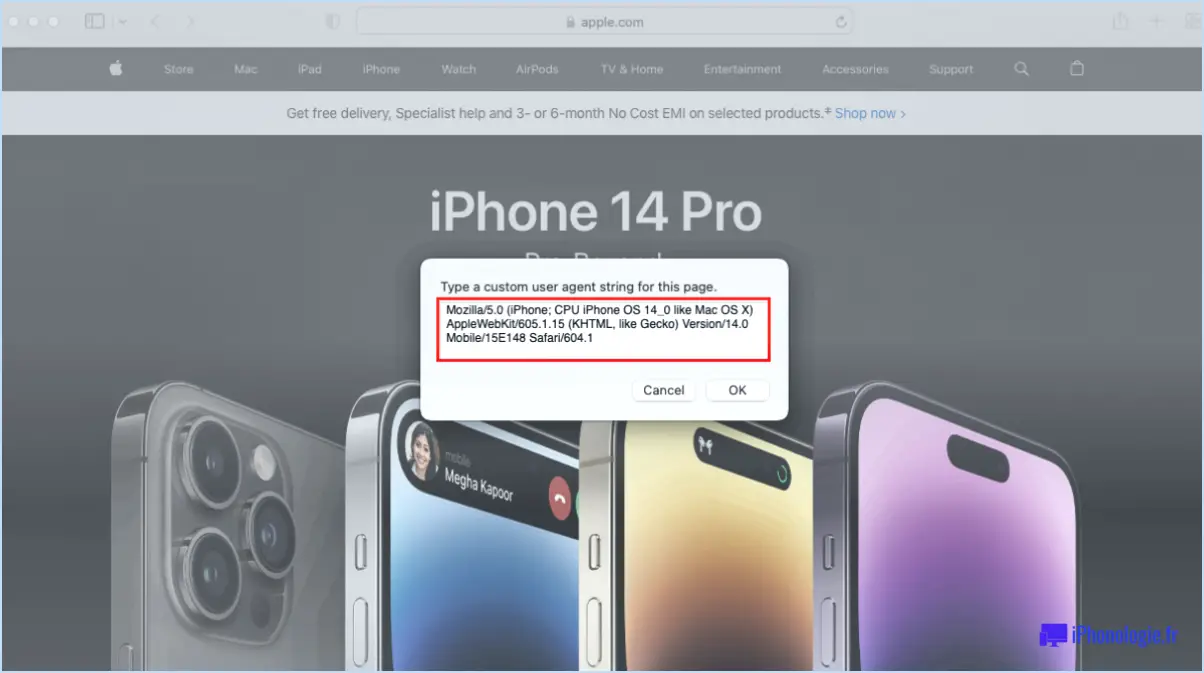
How do I change user agent in developer tools?
To change the user agent in the Chrome Developer Tools, follow these steps:
- Open the Developer Tools by right-clicking on a webpage and selecting "Inspect" or by pressing Ctrl+Shift+I (Windows) or Command+Option+I (Mac).
- In the Developer Tools panel, click on the three vertical dots (⋮) or the "More Tools" option in the top-right corner.
- From the drop-down menu, choose "Network conditions" or "More Tools" and then "Network conditions."
- In the Network conditions panel, you will find the "User Agent" section. By default, the option for "Select automatically" is enabled.
- To change the user agent, uncheck the "Select automatically" box and choose from the list of available user agents.
That's it! You have successfully changed the user agent in the Chrome Developer Tools.
How do I add user agent to Chrome?
To add a user agent to Chrome, follow these simple steps:
- Open the Chrome browser.
- Type "chrome://flags/" into the address bar and press Enter.
- Scroll down until you locate the "User Agent String" option.
- Click the "Enable" button next to it.
- A drop-down menu will appear with various user agent options.
- Choose the desired user agent from the menu.
- Finally, restart Chrome for the changes to take effect.
By following these steps, you can easily add a user agent to Chrome and customize your browsing experience. Enjoy exploring the web with your chosen user agent!
How do I change my Android UA settings?
To change your Android UA (User Agent) settings, you have a couple of options at your disposal. Here's what you can do:
- Browser Settings: Open your browser on your Android device and access its settings. Look for the option related to the user agent string, which identifies the browser and device to websites. This setting may be located under the "Advanced" or "Developer" section. Once you find it, you can modify the user agent string to mimic a different device or browser. This can help you access websites or content that are specifically designed for certain platforms.
- User Agent Switcher App: Alternatively, you can utilize a dedicated app like "User Agent Switcher" from the Google Play Store. Install the app on your Android device and follow the instructions provided to change your user agent settings. These apps often offer a range of pre-defined user agent profiles for various devices and browsers, making it easier for you to switch between different configurations.
Remember, modifying your user agent settings can affect how websites and web services interact with your device, so use caution and be aware of the implications of any changes you make.
How do I change user agent in Linux?
To change your user agent in Linux, there are a few methods you can employ. One simple way is by using the "useragent" command. Just open a terminal and enter the command "useragent." For instance, if you wish to set your user agent as Google Chrome, input: useragent "Mozilla/5.0 (X11; Ubuntu; Linux x86_64; rv:62.0) Gecko/20100101 Firefox/62.0". Another approach involves modifying the user agent string in your web browser's settings. Locate the appropriate configuration file and update the user agent value to your desired string. Remember to save the changes before testing.
How do I disable user agent?
To disable the user agent, you have a couple of options at your disposal.
- Browser Extension: Consider using a browser extension such as User Agent Switcher for Chrome. This extension allows you to modify your browser's user agent easily. By changing your user agent, you can mask your browser's identity and appear as a different browser or device.
- Command Line Tool: Another method is utilizing a command line tool like ua-parser. This tool enables you to parse and analyze user agents. With ua-parser, you can extract information from user agent strings and customize how your browser presents itself.
By employing either a browser extension or a command line tool, you can effectively disable the user agent and enhance your browsing experience. Experiment with these options to find the solution that best suits your needs.
What is user agent spoofing?
User agent spoofing refers to the practice of altering the user agent string of a web browser to mimic a different browser or operating system. By doing so, it allows individuals to disguise their actual browser identity and appear as if they are using a different platform. This technique serves various purposes, including facilitating cross-browser testing for developers and gaining access to websites that may be blocked or restricted on the user's device. User agent spoofing essentially provides a means to manipulate browser identification and bypass certain limitations or restrictions.